We bought our PC-2350 new in June 2007.
Here are things bought & changes made for it to serve us a little better.
As ideas come to mind and are implemented, I add them to this old post.
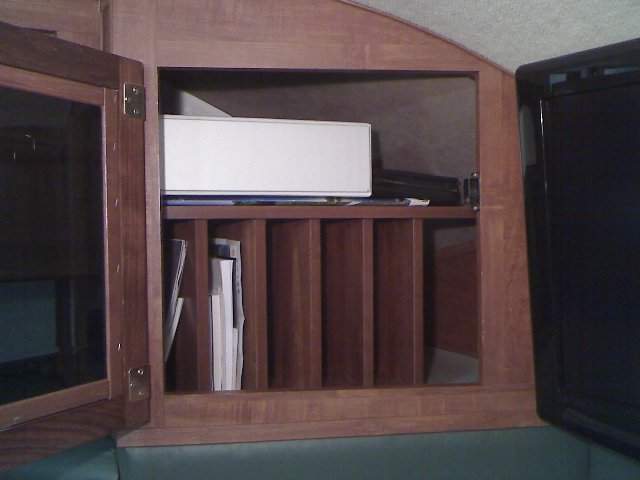
1) Improving Space Efficiency In Front CabinetsWe have the cherry finish option. I found close matching pre-finished shelving at Home Depot.
The top shelf holds our RV documentation, from manuals to vehicle registration and insurance.
The vertical slots are used for park literature and all the rest.
In the right cabinet, I added a shelf to store our laptop computer. I also added a power strip underneath it with outlets at various orientations to accommodate all our different charging power supplies. The laptop, cameras, cell phones, video camera, & two-way radios, all plug in at the same time. All chargers are ready to go at the flip of a switch when we are driving with the inverter on, plugged into shore power, or when the generator is running.
 2) Two Gallon Water Pressure (Accumulator) Tank
Improves the performance of the fresh water pump. Water pressure and temperature is more consistent when dry camping. The pump runs very quietly and cycles on and off at nice comfortable intervals. No more quick on/off loud groaning and vibrations. Simply stated..."Now It Just Feels Right".
Write-up with pictures available. Provide your email address.
Cost Of Project: $50
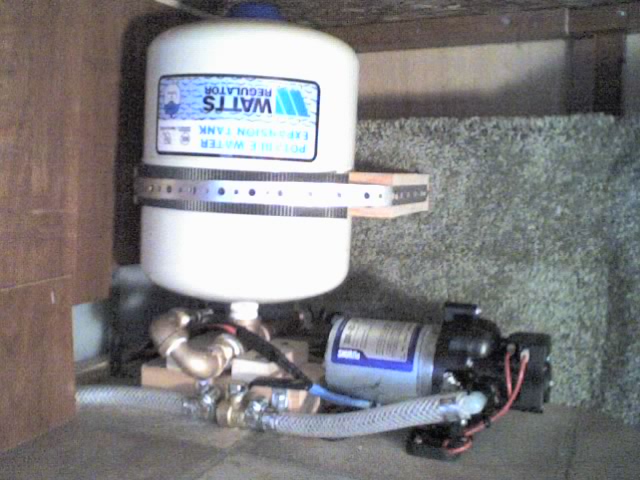
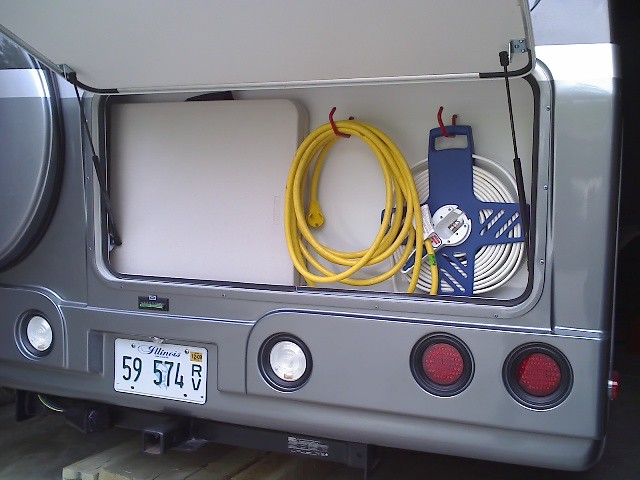
Given it's location in the outdoor storage compartment, I made an enclosure to protect everything.
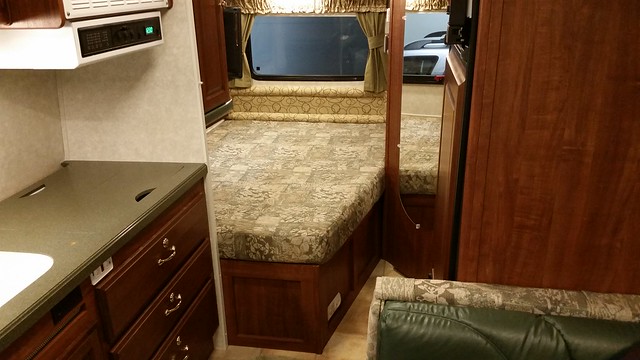
 3) Slide-Out Bedroom Tray
It mounts under an overhanging cabinet at the foot of our bed, utilized as a shelf. We use it all the time.
Cost Of Project: $20
 4) Entry Door Limiter
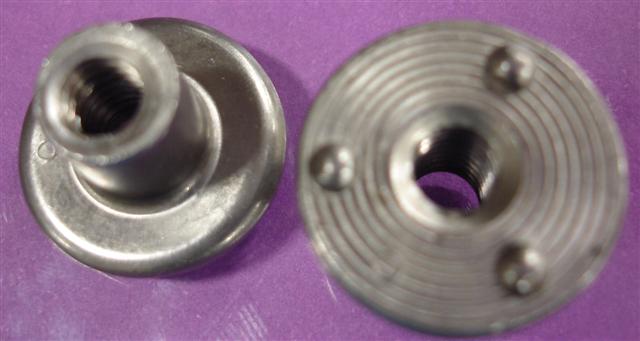
This limits the swing of the entry door. On a strong windy day, the door can easily rip out of your hand, swing around, and crash into the side of the RV. When our awning poles are attached to the side of the RV, this prevents the door from hitting the pole there. The limiter is engaged and disengaged in seconds with the door open or closed. It is not visible when not needed, and is self storing. It also never gets in the way when entering or exiting the RV. The rope stretches a little so it offers a nice "Soft Stop" action. Flange weld nuts are perfect to hook the rope on.
Cost Of Project: $5
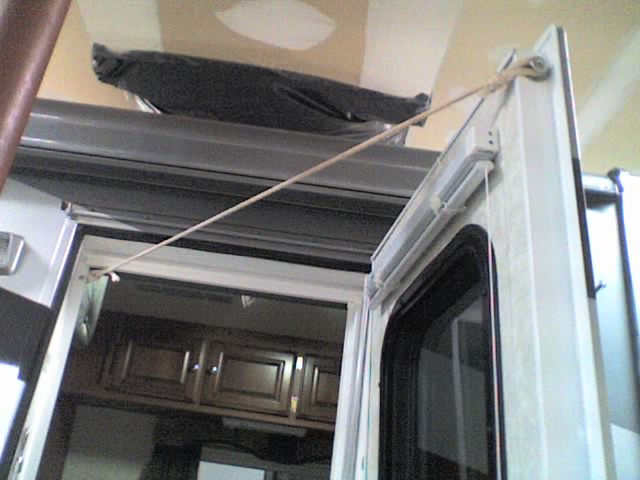
Flanged Weld Nuts work great for hooking the rope on and off from.
 5) Window Shade String Reinforcements
I reinforced the shade tensioners that hold the shade strings at the bottom. No more issues with those things pulling out of the wall when bumped hard, and bumping them is very easy by the dinette and bed. The solution looks nice too. Write-up, pictures & drill template available. Provide your email address.
Cost Of Project: $3 per window
 6) Foam Rubber, Drawer & Cabinet Liners
Wow, what a difference this made with rattles in the RV. We bought solid foam rubber drawer liner material on a roll from a home improvement center. Everything stays put better, and rattles much less.
Cost: $7 per roll. A few rolls were needed. A little carpet tape keeps them in place.
 7) Wall Clock With Indoor & Outdoor Thermometer
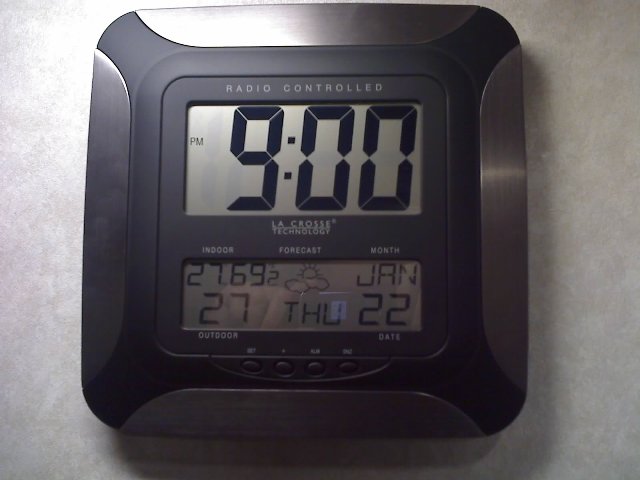
Hang the clock on the wall, and place the transmitter in the rear compartment in it's holster. The clock displays a lot of information including indoor & outdoor temperatures, and indoor relative humidity. It is also an alarm clock. I mounted it to the left of the entry door so it forces us to get out of bed to turn it off. It's great to know the outside temperature.
Cost: $30
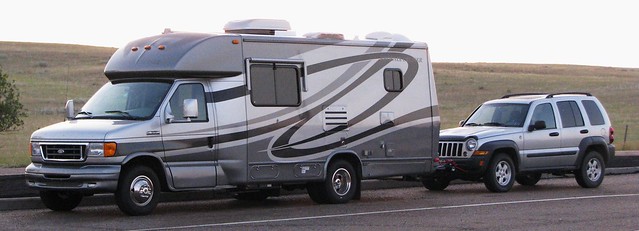
 8) Tow Our Jeep Liberty
With a Unified Tow Brake, our Liberty is very easy and safe to tow.
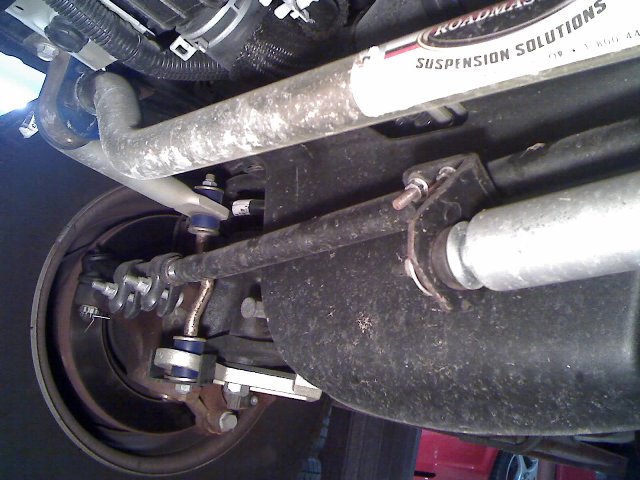
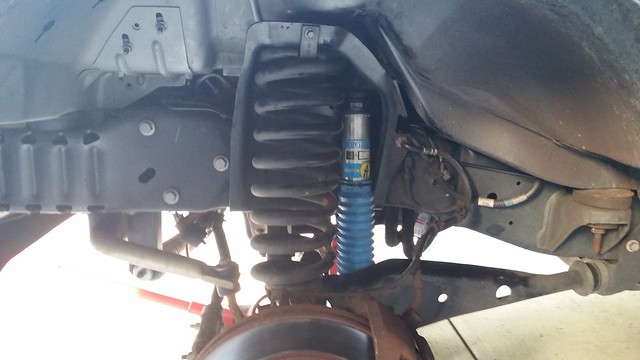
 9) Suspension Improvements On Our 2007 Ford E350 Chassis
Having all this work done by a truck suspension shop was a costly $3900, but I cannot emphasis enough, how this has improved the handling, comfort, and safety of the motor home by leaps and bounds. Our PC-2350 now handles like an SUV...not an RV. No more wandering, boat rocking, swaying, or wrestling when trucks go by or with cross-winds or on uneven road surfaces.....you know....those highways with the groves from heavy truck traffic. My wife can sit at the dinette, and her coffee will stay put on the table. You can also nap in the rear bed without getting tossed around. Mountian roads are taken with the greatest of confidence, even when towing the Jeep Liberty. The RV stays planted on the road in a hard turn, with the brakes able to do their job well. This package also eliminates any need for stabilizer jacks when parked.
If you are mechanically inclined, you can install some of this yourself and save big money. I bought Roadmaster sway bars, but I have since learned that another company Helwig, makes a much lower cost product that is also easier to install.
- Replaced the smaller stock front sway bar with heavy duty Roadmaster version
- Added a rear heavy duty Roadmaster sway bar as there was none on the 2007 E350 (and older) chassis to begin with
- Added a rear Henderson trac bar (the blue thing) to eliminate rear tail wagging (Both In Same Picture)
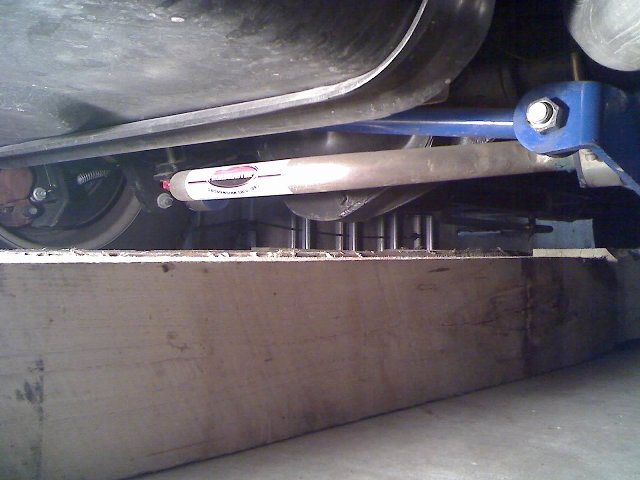
The landscape timbers are simply being stored under the RV. Just ignore them.
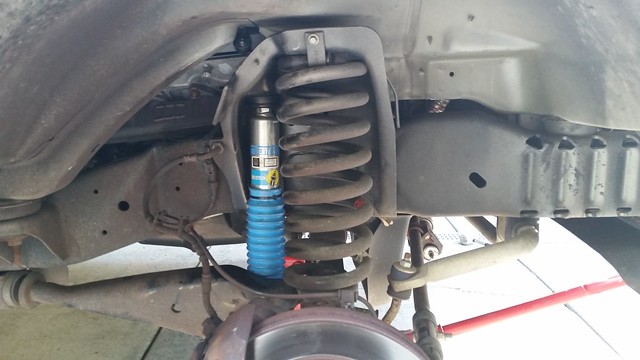
- Replaced the stock Ford shocks with Koni-RV adjustable shocks set to the stiffest setting. 11 years later I replaced the Koni shocks with heavy duty Bilstein shocks.
CLICK HERE to read why I had to replace the Koni shocks and why I selected the heavy duty Bilstein shocks.
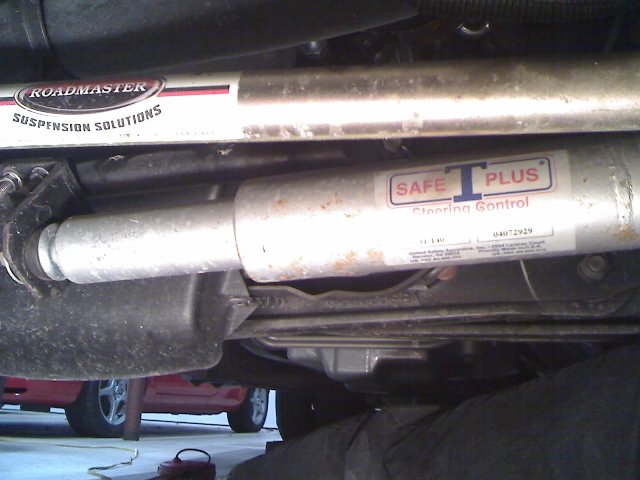
- Replaced the stock steering stabilizer with a heavy duty version by Safe-T-Plus
-
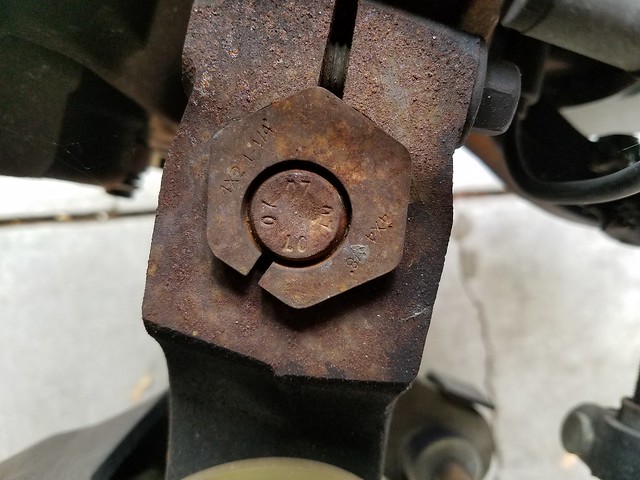
Got A Wheel Alignment Done The shop had to use off-set bushings to set the camber and caster properly. At the time I thought this sounded strange, but have since learned it is typical.

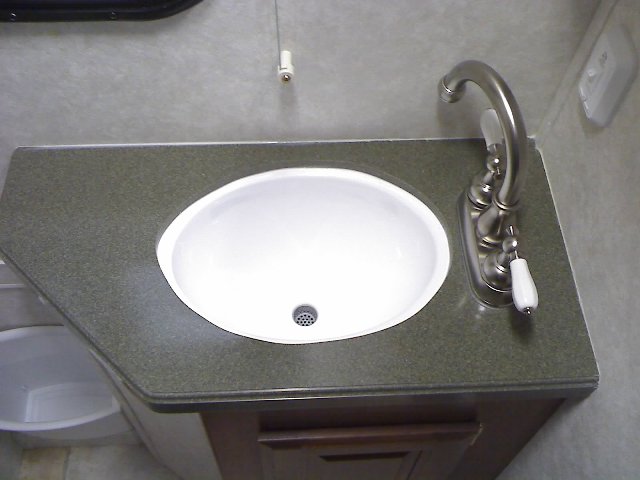
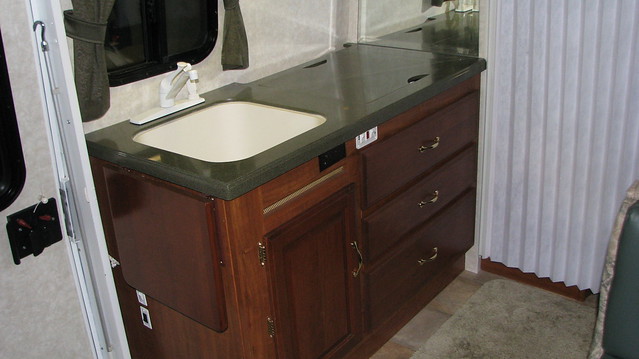
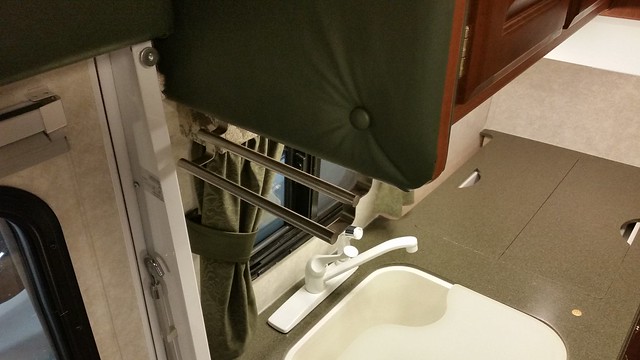
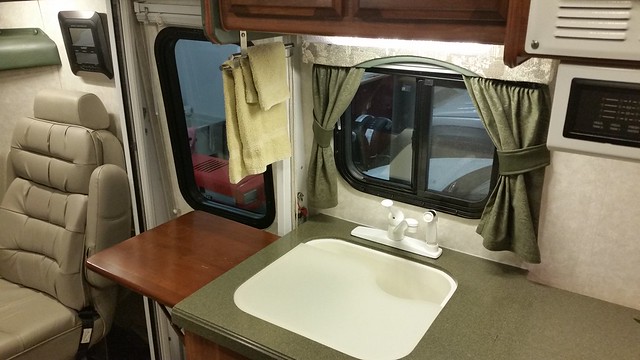
 10) Replaced Generic Plastic Bathroom Faucet With A Nice Pivoting One
When you need the sink clear, simply swivel the faucet aside like a kitchen faucet. The water falls closer to the middle of the bowl providing nice room for your hands under the running water.
 11) Drop In Sink Drain Basket
Fits perfectly flush. No more lost items down the drain. Called a 1 inch drain basket, sold in all home improvement and hardware stores. It simply drops in. Costs around a dollar.
 12) Folding Shower Stool
Works great, very strong, folds up very thin.
Cost Of Stool: $15 at Bed Bath & Beyond

We store it here.
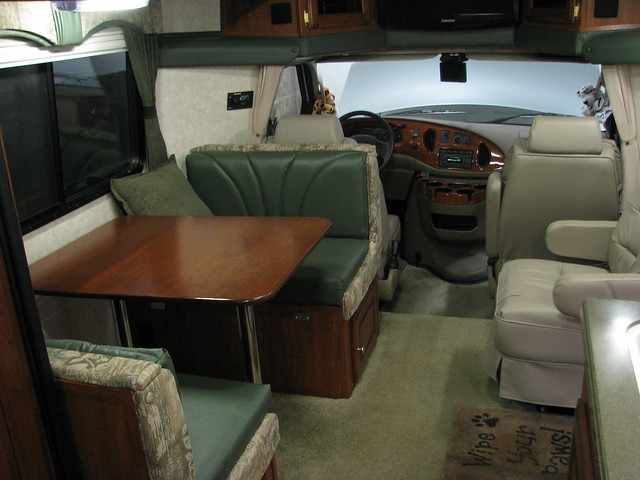
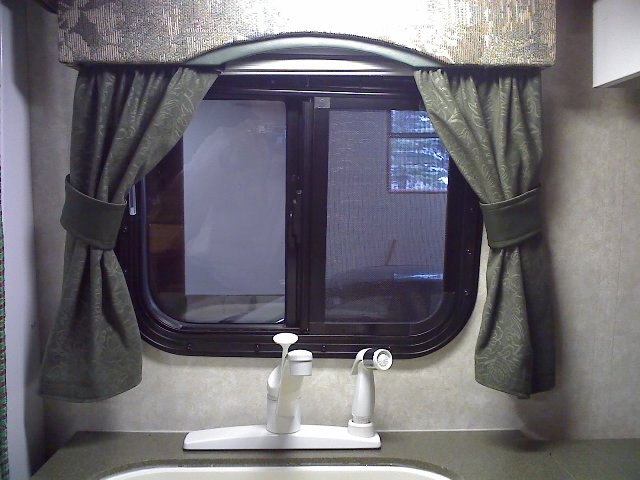
 13) My Wife Irene's Handy Work With Curtains & Pillows
The original curtains were a lighter green. Her new curtains & throw-pillows match the green appoints perfectly.
Our PC had no sink window curtains so Irene made a set for it too.
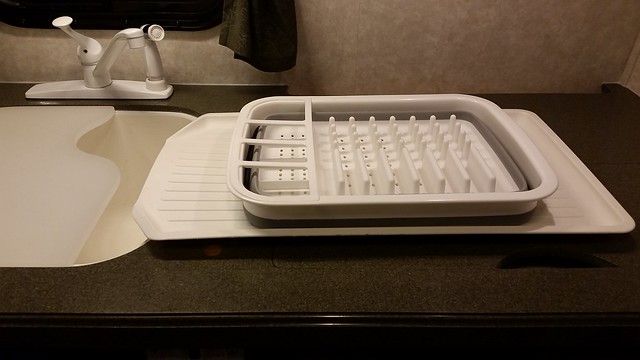
 14) Self-Storing Dish Rack, Fit's Perfectly!
We later found something better for our particular needs, scroll lower.
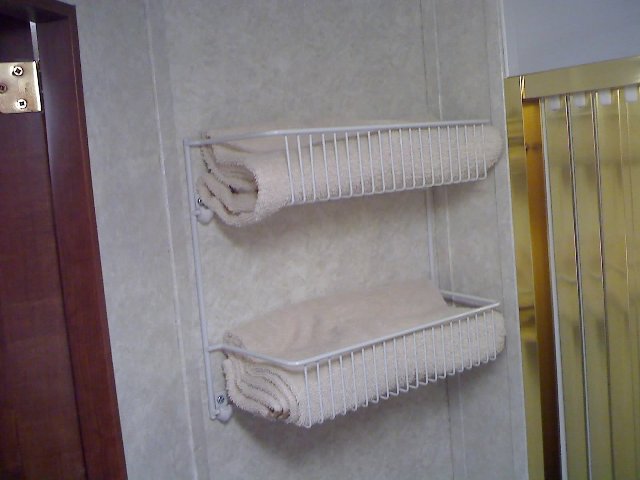
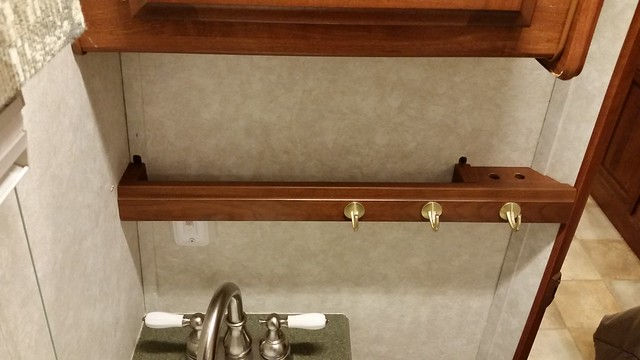
 15) Towel Rack Over Toilet In Bathroom
The picture shows only one towel in each, but we fold-n-roll and stand up all needed towels to fit during trips. The upper for me, the lower for my wife Irene.
 16) Nicely Stored 2' x 4' Fold-In-Half Folding Table With 4 Height Settings
Sold in places like Walmart, Meijer, and Costco, but not all the time. It may be considered a seasonal item.
Stores Easily Inside Rear Compartment
Shown Set At It's Highest Setting
Tallest - nice for a cooking work surface
Middle setting - nice for eating at with regular lawn chairs
Shortest setting - nice with low lounge chairs
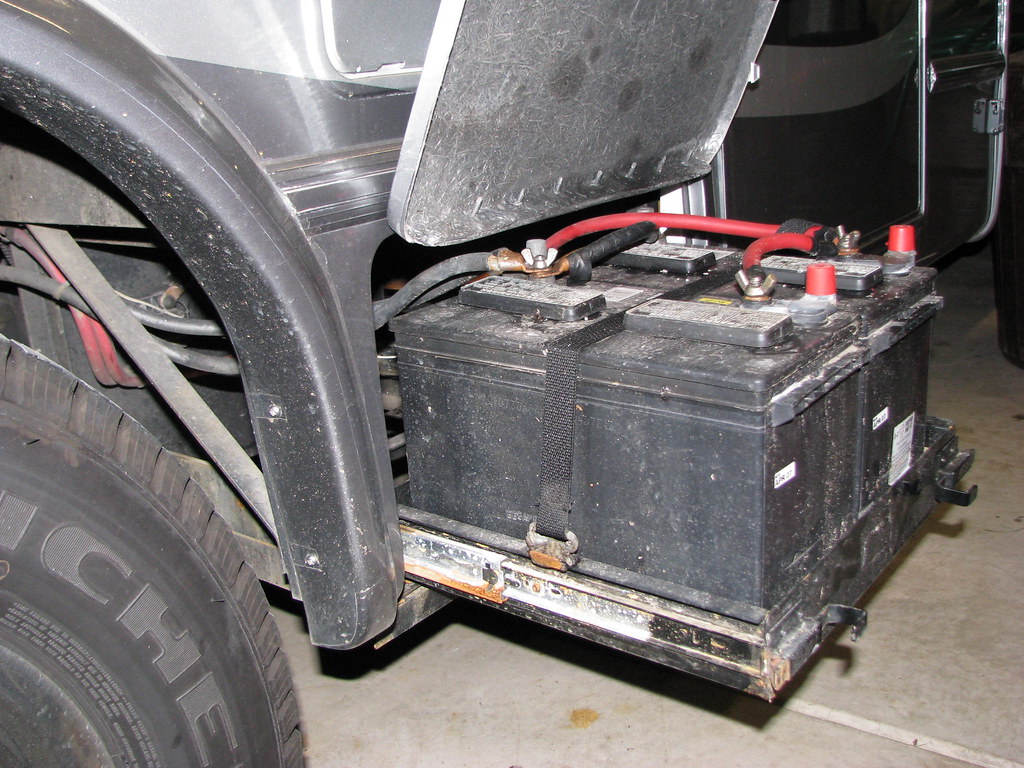
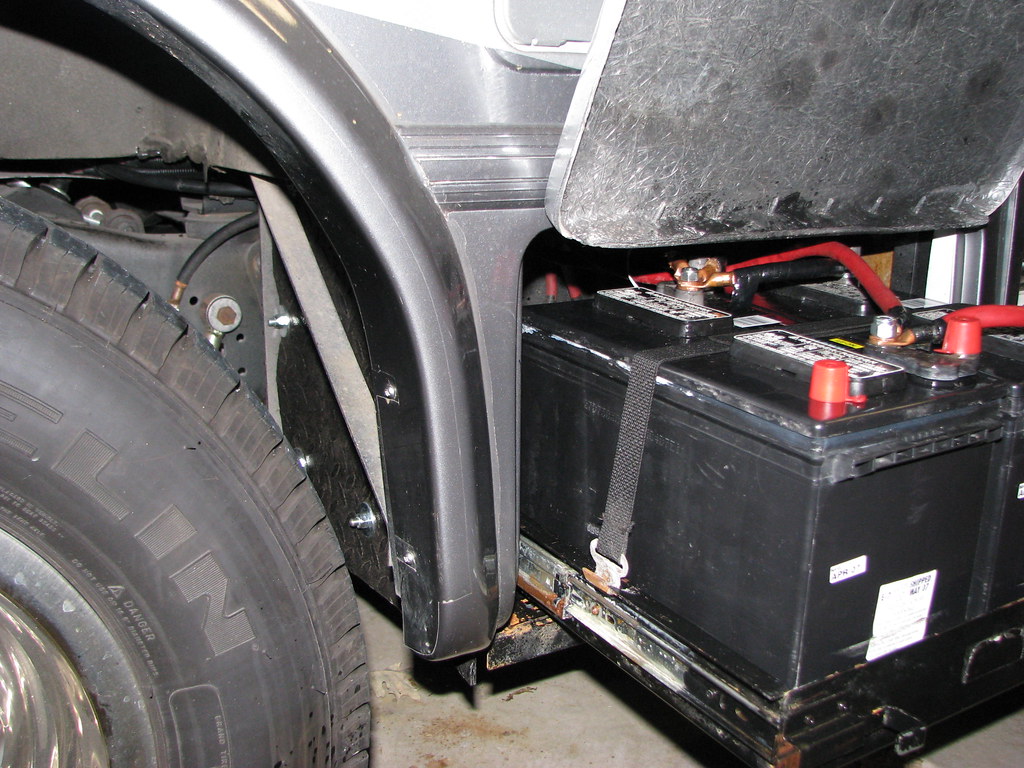
 17) Made A Shield Between Batteries and Tires, Made Of Pickup-Truck Bed Liner Material
More pictures
HERE.
BEFORE
AFTER
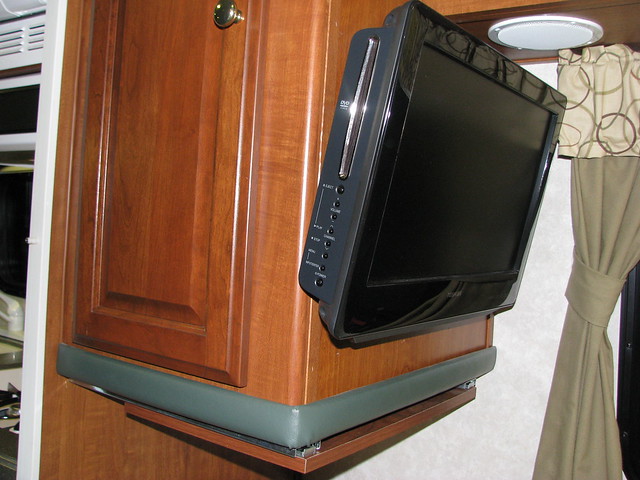
 18) Installed a 19" Widescreen TV/DVD Combo In Bedroom Area
The TV overhangs the cabinet on the isle side, but is flush with the cabinet door. It does not interfere much when getting in and out of bed. Well worth it to us. Widescreen DVD movies are enjoyed in bed. This TV uses much less inverted power than the main TV with sound system.
No concern of draining the batteries when watching TV in bed.
We bought our two TVs years ago. The LED TVs sold today use so much less power, tempting me to replace ours.
 19) Replacing Ford Single CD Radio With Ford 6-CD Radio
Used ones are sold cheap on eBay. I paid $70 including shipping. Fairly easy to swap radios. If you are going to do it, first remove your old radio so you can compare connectors while internet shopping. There are a few different connector designs that look similar and you'll need the one that matches your Ford chassis.
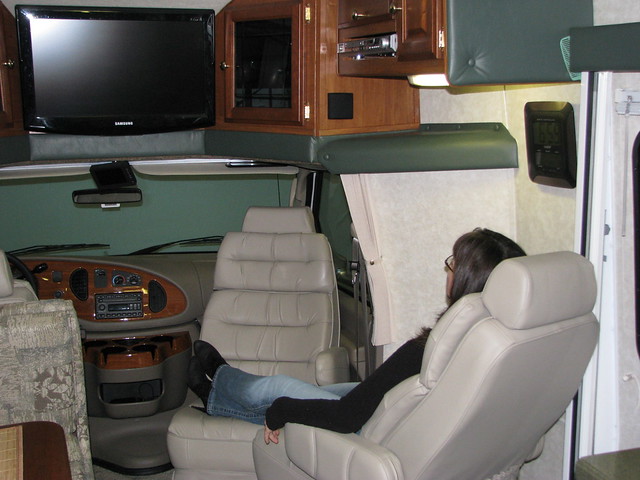
 20) Replacing Barrel Chair With A 3rd Captain Seat That Matches The Front Two
Cost was just over $400 including the 2 arm rests and adjustable lumbar support.
Replaces the original barrel chair in minutes by reusing the pedestal. Much more comfortable and safe.
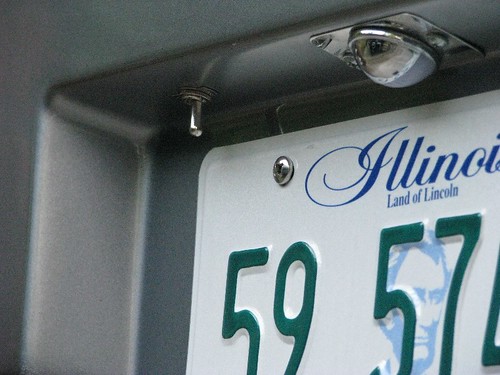
 21) Wired Backup Lights To Switch By License Plate For After Dark Dingy Tow Hookup & Unhooking
The switch is water proof, bought on the internet. The back-up lights are ideal when hooking up in the dark.
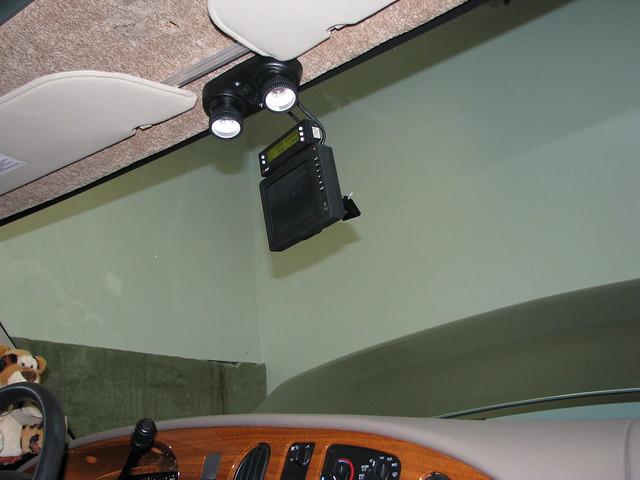
 22) Relocated Backup Monitor To The Mirror Position & Added Scanguage-II
Easy to glance at and I don't hit my head on the monitor anymore.
Universal bracket kit part number is 250-8088 at T&A Service and Supply 800-658-3423 $48 plus shipping
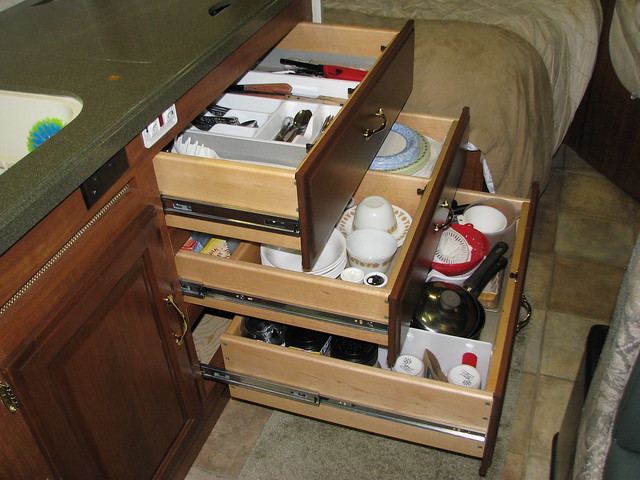
 23) Replaced The 5 small Galley Cabinet Drawers With 3 Huge Capacity Heavy Duty Drawers
This increased our drawer storage by over 85%, nearly doubling it.
CLICK HERE for all the details.
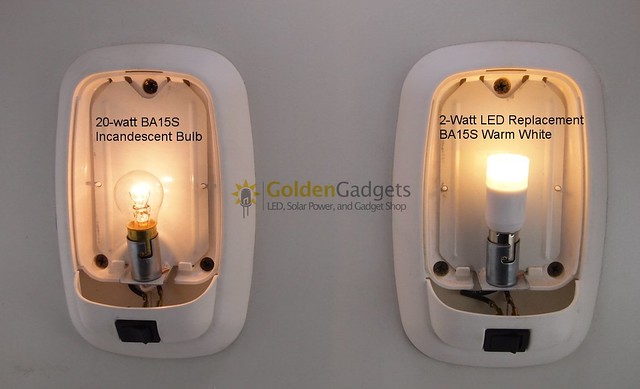
 24) Converted Florescent & Incandescent Lighting To Warm Low Power LED LightingCLICK HERE
 for all the details.
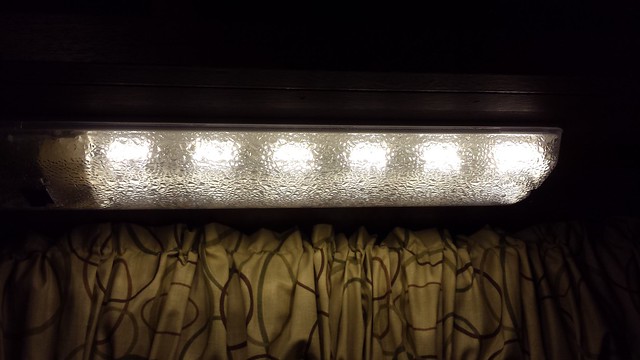
Converted all florescent light fixtures to warm white LEDs, and added an LED mood/night light to each, controlled by a 3-way switch.
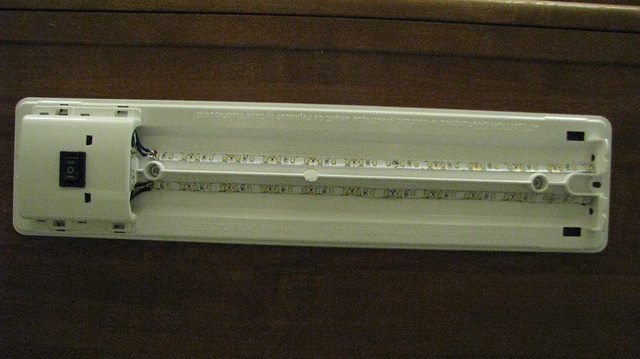
Note the 3-LED nightlight circuit on the side. When all nightlights are on, they offer very nice cozy atmosphere throughout the cabin. Each nightlight is less than 1/3 of one watt.
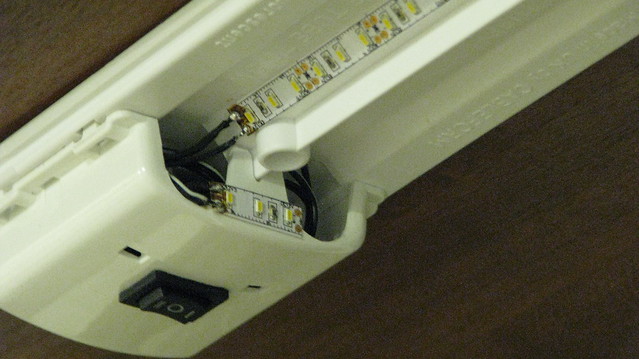
The pair of long LED strips generated too much light so I disabled every other circuit to achieve the proper amount of light which also reduced power consumption to just 3.33 watts per fixture, 1/3 that of the original florescent fixtures.
The closet, shower, outdoor storage, porch, and Sanicon lights all got sealed & frosted LED bulbs that use one tenth the energy.
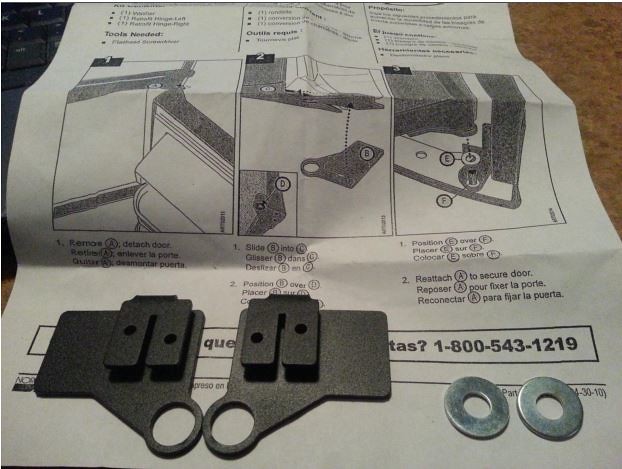
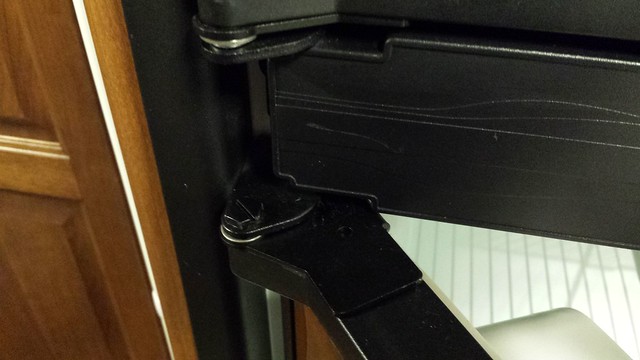
 25) Reinforced The Fridge Door Hinges
The fridge door lower hinge can break on very rough roads when heavy items are stored in the door shelves.
These reinforcements resolve any such concern. As shown, I put one on every hinge.
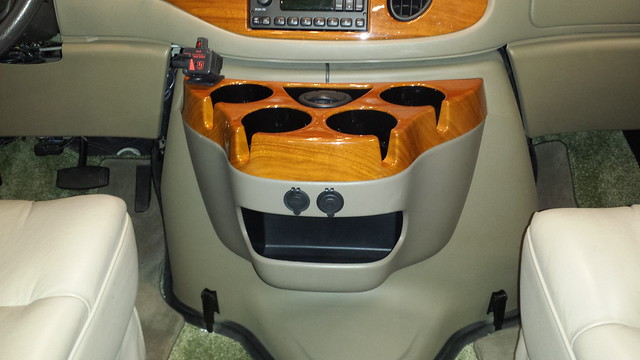
 26) Added two 12V Outlets In The Center Console Front Face
 (one of the two has a pair of USB outlets)
Relocates all charging away from the gear shift lever area for safer driving, provides easy access for the passenger, cleans power cords off our cup holders.
Power is received from the high-power cigarette lighter outlet.
The short vertical dark gray wire seen under the radio, supplies power to the outlets.
Not seen is a hidden in-line connector to easily disconnect the center console, required to remove the engine shroud.
Cost Of Project $7.85 (wires & connector not considered)
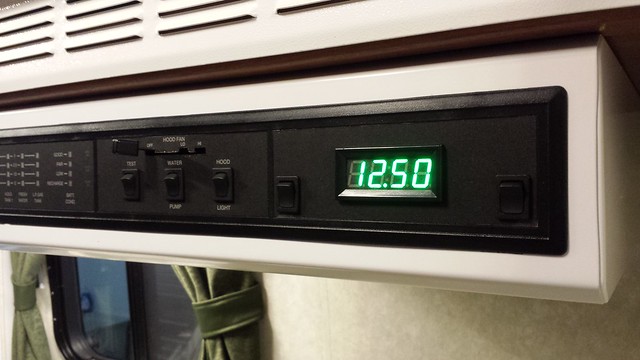
 27) Added A 3-Way Display, Volt Meter, Clock, And Temperature, In The Stove Hood Control PanelCLICK HERE
 to read about it.
Cost Of Project: $24.43
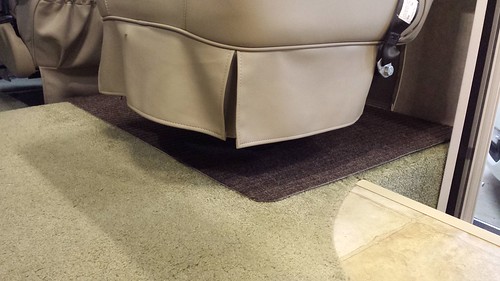
 28) Replaced Limited Coverage Boot Tray With A Full Covering Shoe Mat
Cost Of Project: $9.00
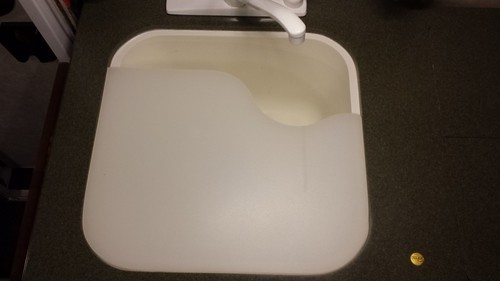
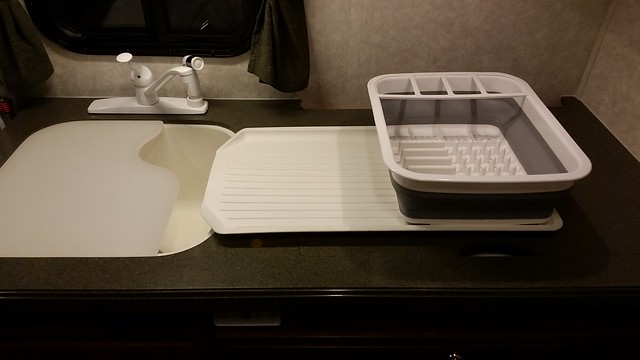
 29) Custom-Fit Reversible Cutting Board Over Sink
Cost Of Project $26.00 (Bought At Bed Bath & Beyond, then shaped to fit)
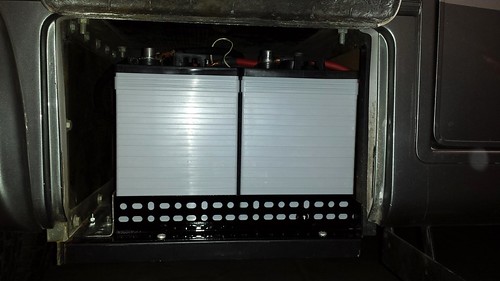
 30) Changed From Two Liquid Acid 12V Batteries, To Two 6V AGM Sealed Batteries
Increased energy capacity & battery performance. Sacrificed the battery tray to fit, but no need for the tray with sealed batteries.
CLICK HERE to read the details.
Cost Of Project $360
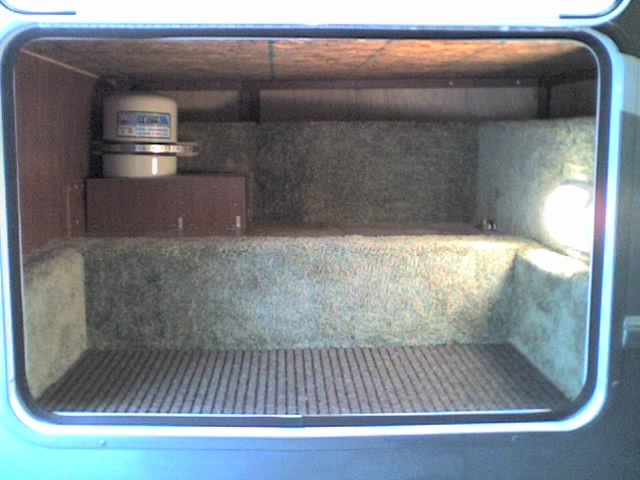
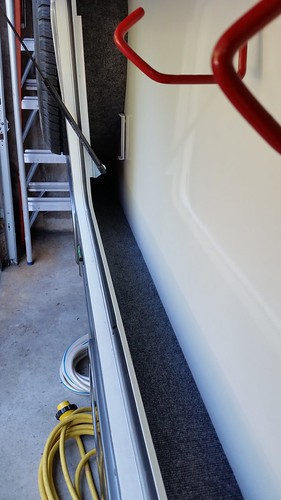
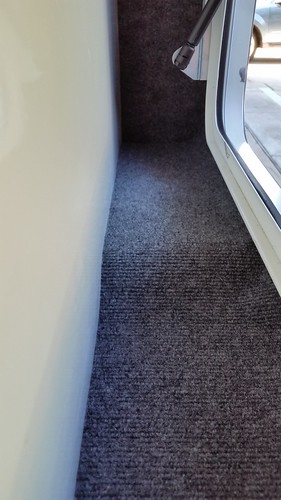
 31) Added Outdoor Carpet Liner To Rear Storage Compartment
Cost Of Project: $5.00 (bought one foot off a large carpet roll at Menards)
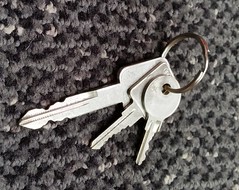
 32) Re-Key'd Some Locks So 3 Keys Works Everything On The PC
Cost Of Project: $44.00
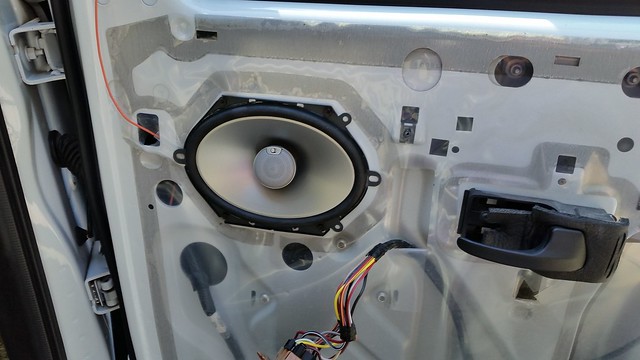
 33) Upgraded Stock 25W Speakers To Infinity 65W (180W Peak) Speakers With Tweeters
Cost Of Project: $78.95
 34) Shallow Shelf In Bathroom Under Medicine Cabinet For Toothbrushes Toothpaste And More
Cost Of Project: $10 (used discarded wood from galley cabinet project)
 35) Resolved Loosening & Rattling Of Microwave Oven
Cost of Project: Under $10
Details
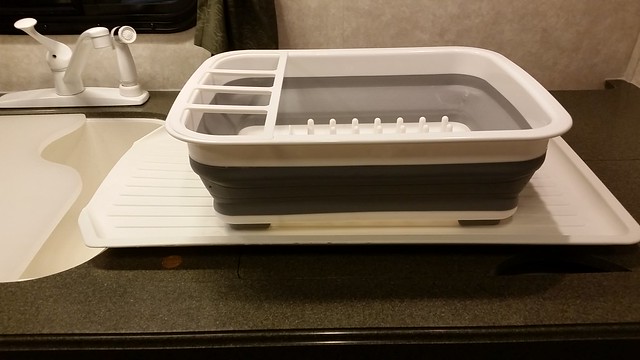
HERE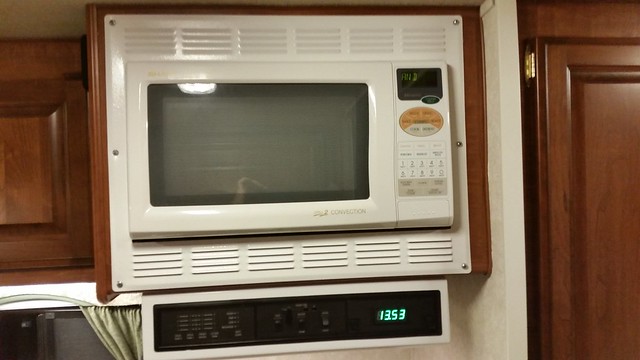 36) Collapsible Dish Rack, Dish Tray, and Cutting Board, Working Together
The collapsible dish rack & tray store easily under the rear dinette bench. The gap in the cutting board allows water to drip into the sink.
Actually I bought 2 collapsible dish racks for larger wash loads. Stacked up they take up so little space.
I retired the dish rack in #14
Dish Rack Open
Dish Rack Collapsed
 37) Added Hanging Gravity Sewer Hose Storage Tube
I ordered this one from somewhere, but forgot from whom. I specified a particular length to consider a Rhino Hose system.
Details
HERE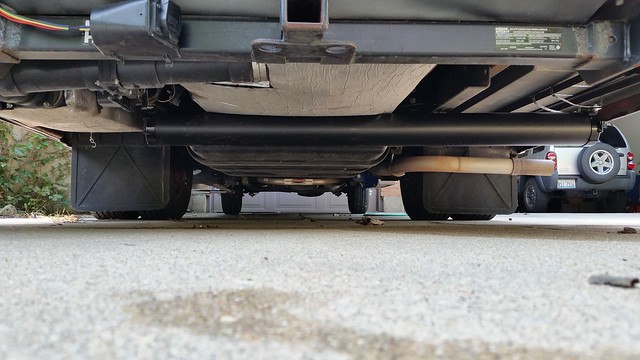 38) Stabilized Our 2-Pole Dinette Table
This modification worked out perfectly.
Details
HERE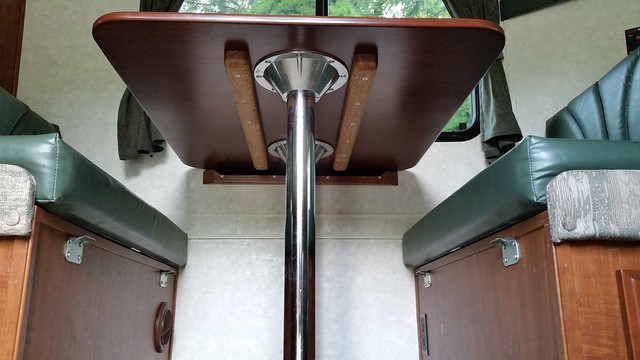 39) Installed A Kitchen Towel Rack
This rack is out of the way, yet very convenient.
Details
HERECost Of Project: $10
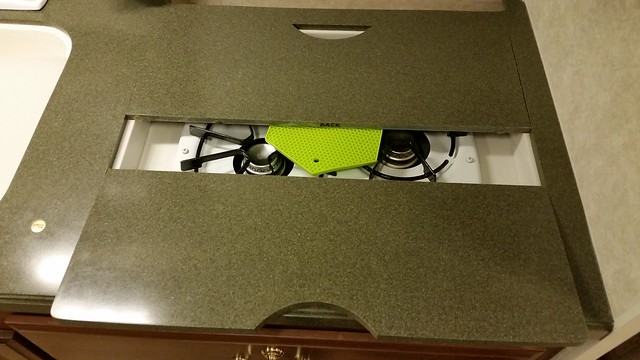
 40) Eliminated Squeaks Originating From The Stove
Placed a thick silicone pot holder over the grates prior to placing the Corian covers.
Also added rubber pads in between the covers for a snug fit.
If you look real close you can see the clear-colored rubber pads.
Also wrote "BACK" and "FRONT" on the edge of the covers to place them for best fit.
 41) Replaced Worn Shock Absorbers With Excellent Results
If your rig likes to bounce up and down in the front,
READ THIS.
 42) Replaced Tired Original Mattress With Store-Bought, Then Modified It
Cost of new mattress with integrated memory foam was $110.
CLICK HERE for write-up with pictures.
 43) Added Shield For Propane Tank, Protecting It From Rear Tire SplashingCLICK HERE
 for all the details with many pictures.
 44) Added Rear-End Skid Rollers To Rear Hitch
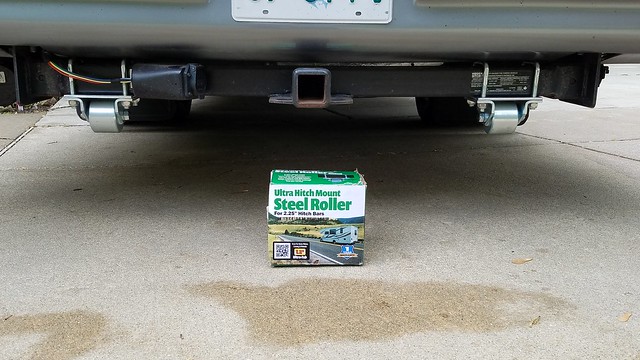 45) Replaced Steel Wheels & Wheel Covers With Alcoa Alloy Wheels
Cost was $1500, but sold the old wheels & tires & wheels covers for $500 so actual was $1000
Each wheel is 20 pounds lighter reducing unsprung weight, draws heat from the brake rotors better, and they simply look more classy.


