After nine years, I think I resolved the loosening and then rattling the worst of the microwave oven.
I removed the six wood screws around the perimeter and pulled out the microwave oven.
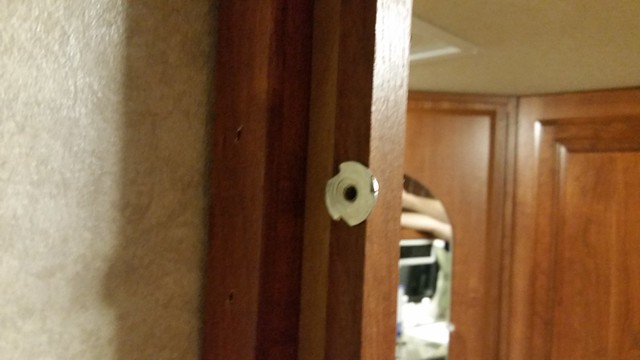
I drilled the top two and middle two holes in the cabinet bigger to accept spiked "T" nuts, the kind often used in furniture, allowing me to use machine screws and lock washers to replace the four wood screws. I replaced the bottom two wood screws with other wood screws that cosmetically match the upper four. All hardware used as shown.

Here is one spiked "T" nut pressed into the enlarged hole from the inside of the cabinet. The hole in the "T" nut is threaded.
I added thick felt pads on the plastic rear feet and thin felt pads on the front rubber feet as not to change the height in front.

I reinstalled the microwave and was then able to tighten down hard the top 4 screws "So Much Tighter" than before when they were wood screws. The bottom two screws had to remain wood screws because there was no means to insert the "T" nuts.
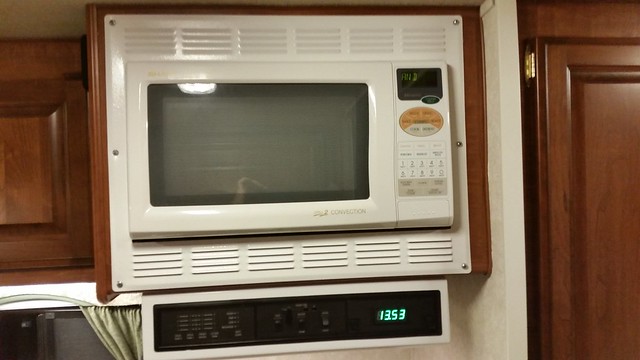
Previously I had to occasionally tighten up the six wood screws which helped for a while but they would loosened up again, often mid-trip, and then came the rattling. I just could not tighten them enough without stripping them.
---------------------------------------------------
Adding in January 2022. This was very effective at stabilizing the microwave oven within the cabinet.
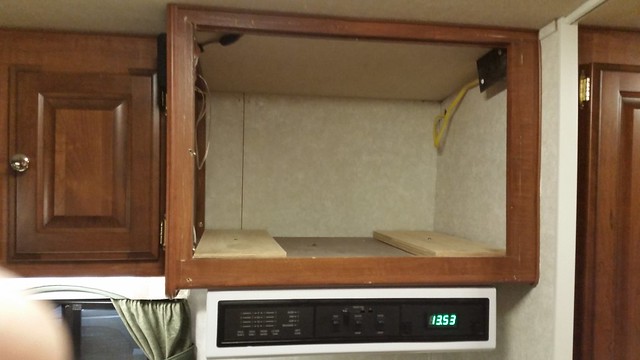
I decided to give a shot at eliminating the last of the noise from vertical vibration/jolting of the back-side of the microwave oven. To snug it up, I installed two wood block spacers covered in a thick industrial padding, an effort to wedge the back of the microwave between the cabinet floor and ceiling.
I measured the gap between the microwave and the ceiling, then cut two blocks of wood to fill the gap. I used 2-sided carpet tape to stabilize them, then "bracketed" them to the microwave.

In this picture, one block of wood has the pad, the other one not yet.

Our trips since have proven that the wood block wedging was effective.
If you read the comments below, I have since added thick felt pads to prevent the metal straps from clanging against the microwave. That tip came from rdalton (Rob Dalton). Thanks Rob for that tip!